Fall Clean Up & Prep

This is no time to quit on your garden. Even if you’ve removed the dead or dying plants there’s work to do prepping your soil for next year’s garden.

Rather than pulling up the plants I use a weed whip to cut the stems about 1-2 inches above the ground. The remaining stems absorb water and act as a wick that delivers moisture deep into the soil, while the roots slowly degrade as organic matter. This is more important in clay soils which tend to saturate at the surface and cause run off.

Breaking the surface of the soil will also improve aeration. If you’re using a tiller just walk it across the field in two directions so the tines cut about 1 inch down. I use a hoe to produce the same result. This also prepares the garden for a fall planting of green manure, preferably a short legume like white clover that naturally increases nitrogen and helps smother weed and grass seedlings in the spring. Continue reading

Posted in Uncategorized | Tagged , , , , , , , , , , , | Leave a comment

Primocane Blackberries Evolve

Three years ago I planted three Prime-Jim blackberry bushes in my garden, and my reason for selecting this variety is that it produces two crops every year, the first in June and the second in late September and into October. The picture below was taken on October 10, 2013.

Blackberries

At the time, the vendor I choose did not carry the Prime-Ark 45 which is much sweeter berry, but I hesitate to recommend it because the University of Arkansas has now developed a new variety called Prime-Ark Freedom.

space

While plants are currently unavailable, seven propagators are licensed to grow Prime-Ark Freedom so look for them in 2014. Here you will find a complete list of all propagators of Arkansas varieties including Prime-Ark 45, Prime-Jim, and Prime-Jan.

Information on growing blackberries is availble as a PDF file from Missouri State nursery in Mountain Grove. Good Luck and Good Gardening!

Posted in Blackberry, Primocane blackberries | Tagged , , , , , , , , , | Leave a comment

Growing Elderberries

The elderberry is a shrub that produces a small round berry that is loaded with antioxidants. It’s very tart and you probably won’t like the taste without sweetening, but it makes good jelly as well as a red wine that is dry and fruity with a bit of musk. At least that’s how mine comes out.

My bushes are now three years old and about 10 foot high. In the fall I’ll be cutting them down and doing a bit of thinning. Elderberries tend to be more productive if the woody stems are removed, Commercial growers often brush hog the plants every third year to maximize the yield. If this your goal then you’ll want to plant three successive rows so you’ll have one full crop every year. I’ll be cutting mine down to three foot and removing the oldest stems in the fall.

elderberries

I’m growing mine along the road where a natural drain helps keep the soil moist. Every year I mulch the drain and around the bushes with leaves to keep down the weeds and preserve soil moisture. Elderberries have a relatively shallow root system that will send up shoots, and  last year began filling the space between the original plantings.

Continue reading

Posted in Elderberry, Fertilization, Leaf mulch, Root Growth, Soil pH, Uncategorized, Watering | Tagged , , , , , , , , , , , | Leave a comment

Primocane Blackberries

Three years ago when I was establishing my garden I planted two berry producing plants, and one of those was the Prime Jim variety of blackberries. Developed at the University of Arkansas, Prime Jim is one of three primocane varieties commercially available.

Blackberries

All but three varieties of blackberries are floricanes, meaning that they flower and fruit once a year on the second year canes. In other words the canes grow for one year without producing flowers or fruit, and then the second year they do.

Primocanes produce flowing and fruit on both first year and second year canes. Second year canes flower in the spring and fruit during the summer. First year canes flower in the summer and fruit in the fall. So at this time, when I’m harvesting berries from last year’s canes, I’m beginning to see flowers on this year’s new growth.

blackberry blossoms

If you really like blackberries and have space to grow them, here’s a few tips to maximize their growth and production. First, they are better grown on a slope because their bed must drain off any excess water. If you’re dealing with a heavy clay soil then you should consider adding sand and leaf mulch to build up the bed while making sure that it drains.

Second, any plant that produces fruit will require higher amounts of phosphorus and potassium than green plants that use more nitrogen. Because phosphorus is relatively stable and doesn’t leach out, it’s important that you mix phosphorus into the bed and throughout the root zone. My preference is super phosphate which is simply rock phosphate treated with phosphoric acid, but you can use rock phosphate or bone meal to supplement the bed, you’ll just have to use more of it.

Blackberries like acid soils and mulching with leaves maintains the acidity. I flag the second year canes and prune them out in the fall because they die back anyway, and end up clogging the patch. This is a good practice even if you’re growing a floricane variety.

You can get additional information on all varieties of blackberries produced by the University of Arkansas here. They also have links to vendors where you can purchase their varieties. Personally I really like having a patch of blackberries close to home, and you might enjoy that too.

Posted in Fertilization, Leaf mold, Leaf mulch, Root Growth, Soil pH | Tagged , , , , , , , , , , , , , | 2 Comments

DIY Seed Tape

If you’re like me you probably wished at one time or another than there was a better way to plant small seeds. Seed tape solves that problem, but not everything I want to grow is available. It’s also downright expensive compared to the cost of bulk seed.

So I got a tip from another gardener and I’m going to share it with you. All you need is some newspaper and flour. Every month I get a news update from our local coop, seedTapeand like most papers they use a soy based ink so it’s safe for the garden. But you could use paper towels, or any porous paper you have available.

Next I mix flour and water into a batter about the same consistency as you would for pancakes. then I place a dollop on the paper with enough spacing for the plants and then drop a seed into the batter. In this case I’m planting radishes, but it works well for lettuce, and other garden favorites. Of course instead of covering the whole page you can slice it into strips and create a row if you like.

In the garden I prepare a spot about the size of the page, and then plant the page and seeds and cover it all up. Once the paper is wet it offers little or no barrier to the roots and this eliminates the need to pull plants that are too close together. I use a potting mix just below the planting and then use it to cover over so I don’t introduce weeds.

seedTapeCovered

So there you have it. Do it yourself seed tape. Good Gardening!

Posted in Uncategorized | Tagged , , , , , , , , , | Leave a comment

Weeds, Water, and Mulch

I’m not sure that anyone enjoys weeding a garden, but there are some advantages to doing so besides eliminating the weeds. Using a hoe is the most common method, and the secondary benefit is that you aerate the soil surrounding the plant and make it more permeable to moisture.

When it comes to watering I’d like to dispel one of the most common myths: Watering during the day, when the sun is shining can burn your plants. This has never happened to me, and even nature provides a rebuttal. How many times have you seen a thunderstorm followed by sunshine?

Now it’s true that watering during the heat of the day increases evaporation, but evaporation also has a cooling effect. Of course the preferred effect is to get the water deep into the soil or at least throughout the root zone using drip irrigation, or leaky hoses. I use the latter and they work just fine, though they still put out more water than my clay can readily absorb unless I turn the faucet down so there’s no pressure on the line. Gravity takes care of keep the hose full.

cornRows

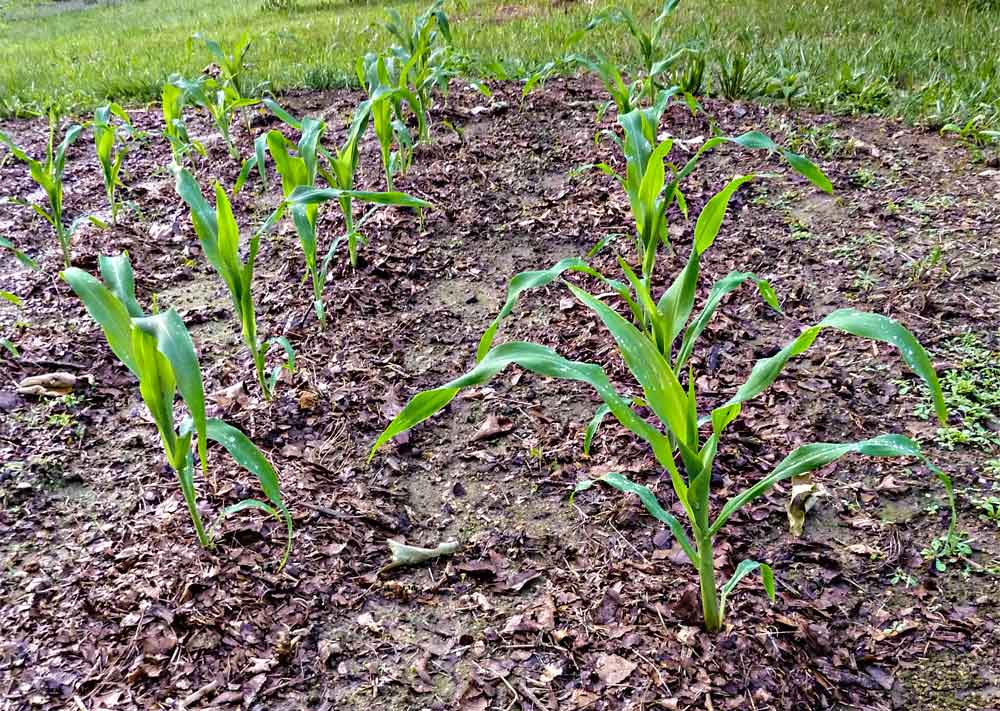
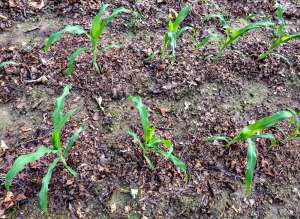
Here’s a view of my second planting of corn at three weeks growth. Next year I hope to expand my garden so I can make three successive plantings so it all doesn’t come in a once. This shot was taken after a hard rain.

I had hoed the field and applied a coarse mulch around the plants.
While the soil was chopped up pretty well before the rain you can see that it has flattened completely while the mulch has remained in place. In fact I suspect that any erosion of the soil is now captured by the mulch in addition to any nutrients.

Of course if you’ve been reading this blog you know that I make mulch from oak lea

ves which are pretty acidic, often around 4-5 on the pH scale but I’d added granulated lime before hoeing the plot to buffer the effect of the mulch.

I know most gardeners favor composting, and when I was at the University of Arizona I did an independent study on composting, but I’ve since decided that it’s not a viable solution for me, or anyone else who has an abundance of leaves.

corn field mulched

For one thing, compost must be tended to maintain the process and that’s just extra work. An active compost pile also produces CO2, and if the pile isn’t sheltered a hard rain can turn it into mush. So I started mulching leaves, piling them into a natural drain, and soaking them down. By maintaining the moisture a natural fungus grows on the leaf material which worms find to be quite tasty. And worms can be a gardener’s best friend.

Posted in Compost, Drip Irragation, Fertilization, Leaf mold, Leaf mulch, Soil pH, Soils, Urban Gardening, Watering, Worms | Tagged , , , , , , , , , , , , , , | Leave a comment

Add Lime to Increase Plant Growth

Last year I wrote about “finding the sweet spot” by balancing the pH of your garden soil. Regardless of whether you use conventional fertilizer or organic matter to improve your soil fertility adding granulated lime will make your garden more productive. Granulated lime also has trace amounts of magnesium, and both are essential for healthy plants.

Nutrient availability compared to pH levels

Nutrient availability compared to pH levels

Let’s look at that pH chart again. As you can see at pH of 6 all of the primary nutrients are readily available. As I wrote before the sweet spot is actually ph 6.3-6.8.

Calcium is important in root system development, and metabolizing other elements, especially nitrogen.

Magnesium  is the core element in chlorophyll, and without sufficient quantities the plant can not sustain its development.

Most calcium deficiencies exhibit as poor growth, and in tomatoes and peppers blossom end rot develops in the fruits. Catch it early, add granulated lime around the roots, and the deficiency will correct itself. Remember most of the uptake comes from the shallow roots, and adding lime won’t burn the plants. Here’s some images you can use to detect a calcium deficiency. Continue reading

Posted in Calcium deficiency, Compost, Epsom Salts, Fertilization, Granulated Lime, Leaf mold, Leaf mulch, Magnesium deficiency, Root Growth, Soil pH, Watering | Tagged , , , | 2 Comments

Coffee Cans in the Garden

In previous posts I’ve promoted the use of both coffee cans and milk cartons as plant containers in the garden. Not only can you concentrate your water and fertilization, but you can all but eliminate weeding since the roots will grow into the soil directly below the container. This past week I planted my Jalapeno, Habanero, and Cayanne peppers into coffee cans surrounded by hoop frames and covered in mulch.

Peppers planted in Coffee Cans

This is the second year for these cans and in the fall they’ll find their way to the recycling center. Last year I used the wire hoops on my tomatoes but they easily out grew the confines while my peppers could have used the support.

One problem endemic to the Ozarks is gravel throughout the soil profile, and red clay which does not hold water or nutrients as well as other soil types. In order to sink the wire frame anchors into the ground you need to make a pilot hole with a steel tent stake, though I’ve also used a short piece (12″-18″) of steel rebar that’s available from any RediMix concrete company. This can prevent the otherwise inevitable bending of the anchors.

Peppers planted in coffee cans and covered with leaf mulch.

Peppers planted in coffee cans and covered with leaf mulch.

My peppers were finished in 4″ pots so I added about 3″ of potting mix in the bottom of the can. This area of my garden is particularly rich as I’ve added about two inches of worm castings and supplemented that with mature leaf mold. But the main reason for planting my peppers in this location is that I can control the watering. Peppers like it dry as they mature and that adds some spice to their fruits.

Posted in Compost, Container Gardening, Fertilization, Leaf mold, Leaf mulch, Soils, Uncategorized, Urban Gardening, Watering | Tagged , , , , , , , , , , | Leave a comment

Planting and Mulching Tomatoes

Last year I tried a new variety of tomato, the Park’s Whopper. They’re a slicing tomato and the vines are too vigorous for staking so this year I plan to let them grow free on a bed of mulch and straw. I’m a real believer in leaf mulch, and I’m seeing the results in the worm population which continues to increase.

limedMulch

Click for a larger image

Worms don’t actually eat the leaf material until it breaks down into minute particles, but they love the fungus that grows on leaves, and as they move through the mulch they help break it down. One concern is that leaves are very acidic so if you want to avoid a calcium deficiency and the inevitable blossom end rot in your tomatoes and other fruiting vegetables you need to incorporate some lime around the plant and then dust the mulch as I’ve done in the photo to the right. While the soil acts as a buffer, and it’s hard to apply too much, I only add a handful to the soil around the plant and another handful to the mulch. If you like to measure, about 1/2 to 3/4s of a cup should be enough.

Continue reading

Posted in Container Gardening, Fertilization, Leaf mold, Leaf mulch, Plastic containers, Root Growth, Soil pH, Uncategorized, Watering, Worms | Tagged , , , , , , , , , , | Leave a comment

Ready to Plant

Last month I wrote about using plastic containers for a weed free garden with a follow-up on bottom heating for root growth. Well here’s the results:

ready2plant This is a tomato plant in a two liter bottle. I’ve gained a considerable amount of root growth in just a few weeks. I should add that the bottle is reflecting my hand on the left and grass on the right side – just so you don’t think that green is a fungus.

While it’s not quite as evident here’s the root growth of a tomato in a milk container:

ready2plant2

So now all that is left to do is dig a hole, cut off the bottom of the container and plant it without removing the plant from the container. Not only does this keep weeds from the stem of your plants, but it also facilitates watering and fertilization directly into and through the plant’s root system. Perfect for drip irrigation as well.

Posted in Bottom Heat, Container Gardening, Drip Irragation, Fertilization, Getting Ready to Garden, Plastic containers, Root Growth, Uncategorized, Urban Gardening, Watering | Tagged , , , , , , | 1 Comment